
Bugs are a costly inconvenience with only one solution: in-depth web application testing.
Without thorough testing, there’s a high risk that a web application will crash during production — or that hackers will find and exploit a vulnerability.
If you're looking to build or are already building a web app, you can save yourself both money and time by learning the best practices for testing web applications.
Read on to learn the fundamentals of web application testing.
Contents:
Key Steps of the Web App Testing Process
Step 1: Functional Testing
Functional testing is an essential part of the web app testing process. The purpose of functional testing is to verify the proper functioning of a website or web app's features.
Functional testing can confirm if the application meets a specified set of requirements, as well as if it works as expected for end users.
There are many different types of functional testing that you can perform on a web app. These include:
1. Cookie Testing
This type of testing looks at how the website’s cookies behave.
Cookie testing includes checking if cookies have the correct configuration, and whether they are retained and deleted as needed or required. For example, testing if a visitor's username information is retained for the next time they visit the website.
2. Link Testing
Link testing certifies that all hyperlinks are functional and direct users to the intended destinations. It involves manual testing to confirm that all links are accurate and guide the user to the correct, up-to-date destination page or file.
This prevents broken links and ensures smooth navigation.
3. Form Testing
Form testing focuses on validating the functionality of input fields in a website form. To test a form, the tester will need to check whether the required fields are correctly validated, that the proper error messages display when the user enters inadequate data in a particular form field, and that the form accurately processes data upon submission.
4. CTA (Call-to-Action) Button Testing
Call-to-Action (CTA) buttons are an integral feature of website user interactions.
Testing CTA buttons involves verifying that the buttons are clickable, prominently displayed, and able to trigger the desired actions or responses upon clicking.
By performing cookie testing, link testing, form testing, and CTA button testing, you can verify a web app’s functionality to deliver a better, more seamless user experience.
Step 2: Usability Testing
Usability testing assesses whether a web app’s target audience can use the app with ease. It also assesses the quality of the overall user experience.
During user testing, the tester should look for accessibility issues or other constraints that may have an adverse impact on user engagement and satisfaction.
Follow the steps below to test the usability of a website or web app:
1. Develop a Testing Strategy: The first step is to define the scope and parameters of what you will test. This includes your test objectives (what you hope to learn from the testing) and scenarios for testing (the context or situations in which the testing will take place).
Once you know your test plan, determine the set of tasks (also known as a test suite) that your testing team should perform for each scenario. If you’re building an e-commerce web app or a product storefront, one way to test usability is to have a team member try to order a product.
2. Hire a Testing Team: Choose a diverse group of people who represent the intended audience of the website. A testing team does not have to, but can include people from many backgrounds including developers, QA teams, or end users. You will gather more diverse opinions if you involve people with a variety of technical skills and skill levels.
3. Perform Tests and Record Observations: Assign tasks to test group members and observe them completing the task. Encourage them to provide feedback and share their thoughts during the testing session. The usability test coordinators should record any usability issues, difficulties, or positive experiences encountered by the participants.
4. Make Improvements Based on Feedback: Use the data from the test to improve website design, navigation, content, and interactions. Prioritize prevalent concerns or issues with high severity.
Related: Website Resilience Testing: Ensure Your Site’s Performance

Step 3: Interface Testing
Interface testing ensures that the interactions between web application components are secure and smooth.
The primary interfaces that need to be tested in web apps include the following:
1. Web Server and Application Server Interface Test
This interface test ensures that communication between the web server (which hosts the webpage) and the application server (which processes the business logic) functions correctly. It involves testing the request and response mechanisms, data transfers, and error handling between these components.
2. Application Server and Database Server Interface Test
This test evaluates how well the application and database servers integrate and share data. It involves authenticating the retrieval, modification, and storage of data. Application server and database server interface testing focuses on data consistency, integrity, and the appropriate management of database transactions.
Testing techniques for website interfaces include:
API Testing: Tests the Application Programming Interfaces (APIs) that allow different parts of a program to communicate with each other. API testing checks error handling, data integrity, user authentication, and the validation of request and response forms.
Data Flow Testing: Checks the backend data flow between website components to ensure the safe and correct movement of data. It can also involve checking data encryption, decryption processes, and general handling of sensitive information.
Step 4: Compatibility Testing
Compatibility testing ensures a website performs as expected across different environments, devices, and browsers. It identifies compatibility issues that may otherwise affect the application performance.
There are three main types of website compatibility testing approaches:
1. Web Browser Compatibility Testing
Web browser compatibility testing, also known as cross-browser testing, checks whether a website can properly render across different browsers like Chrome, Firefox, Safari, and Internet Explorer. Look for differences in rendering, layout, CSS compatibility, JavaScript compatibility, and supported HTML standards.
2. Operating System Compatibility Testing
To determine how well a web app functions when accessed over different operating systems, such as Microsoft Windows, macOS, Linux, iOS, and Android, you can test its operating system compatibility. Check for any OS-specific functionality, appearance, or performance issues.
3. Mobile Device Compatibility Testing
Given how many people use mobile devices to browse, it’s essential to test a website’s compatibility with different devices. Consider factors like smartphone and tablet responsiveness, user interfaces (UI testing), layouts, touch interactions, and performance.
Step 5: Performance Testing
A performance test evaluates a website's responsiveness, speed, scalability, and stability under various workload conditions. It identifies performance bottlenecks and determines whether the website can handle anticipated levels of user traffic.
Website performance testing includes:
1. Web Stress Testing
Web stress testing evaluates a website's performance under high load or stress conditions. It confirms the stability and responsiveness of the website when subjected to heavy user traffic or increased system demands.
2. Web Load Testing
Load testing assesses a website's performance. To do this, testers gradually increase the user load to simulate real-world usage scenarios.
Web load testing can identify performance degradation, response time delays, or resource limitations as the user load increases. This test is indispensable for web apps with large user bases, such as social media or e-commerce platforms.
3. Response Time Testing
Response time testing measures how fast a website’s various operations respond to interactions. Test metrics include how long it takes to load a webpage, as well as how long it takes to process user requests, perform database queries, or complete other critical tasks.
Consumers love websites with fast response times. Keep user engagement high, and leave customers with a good impression, by optimizing your web app’s response time.
4. Scalability Testing
Scalability testing evaluates a website's ability to handle increasing user loads by adding resources or scaling the system infrastructure.
Step 6: Security Testing
Security testing looks at how well a web app protects against threats, vulnerabilities, and unauthorized access.
Its ultimate goal is to safeguard user data. Web security testing approaches involve the identification of application security loopholes, weaknesses, and potential threats that attackers could exploit.
Here are the four primary steps of the web app security testing process:
Step 1: Outline Test Objectives and Goals
Define the specific security objectives and goals for testing. Consider factors such as compliance requirements, industry standards, and the website's sensitivity.
Given the prevalence of DDOS attacks, for example, checking your web app’s DDOS protection is one of the more common security test objectives.
Step 2: Define the Performance Baseline
In order to determine what qualifies as poor security performance, you first need to establish a baseline for normal website security and behavior. This helps identify any abnormal or suspicious activities that may indicate security breaches.
Step 3: Introduce and Measure Disruptions
Next, introduce various security tests like penetration testing, vulnerability scanning, and security code reviews. These tests aim to uncover potential security vulnerabilities, weaknesses in the website's infrastructure, or flaws in its code.
Step 4: Assess Test Results and Make Informed Improvements
Analyze the test results, then prioritize them based on severity.
Take necessary measures to address the identified security gaps. Measures may include applying patches, resolving code vulnerabilities, enhancing access controls, or implementing additional security measures.
By following these steps, you can ensure a thorough evaluation of your website's functionality, usability, interface, compatibility, performance, and security.
You Might Like: A Critical Comparison of the Best of the Best Website Feedback Tools

Best Web Application Testing Tools
Automation tools for web application testing can automate aspects of the testing process. Use them to expedite your testing workflow while improving your web app’s overall accuracy and efficiency.
Any of the web application testing tools listed below can improve your testing process.
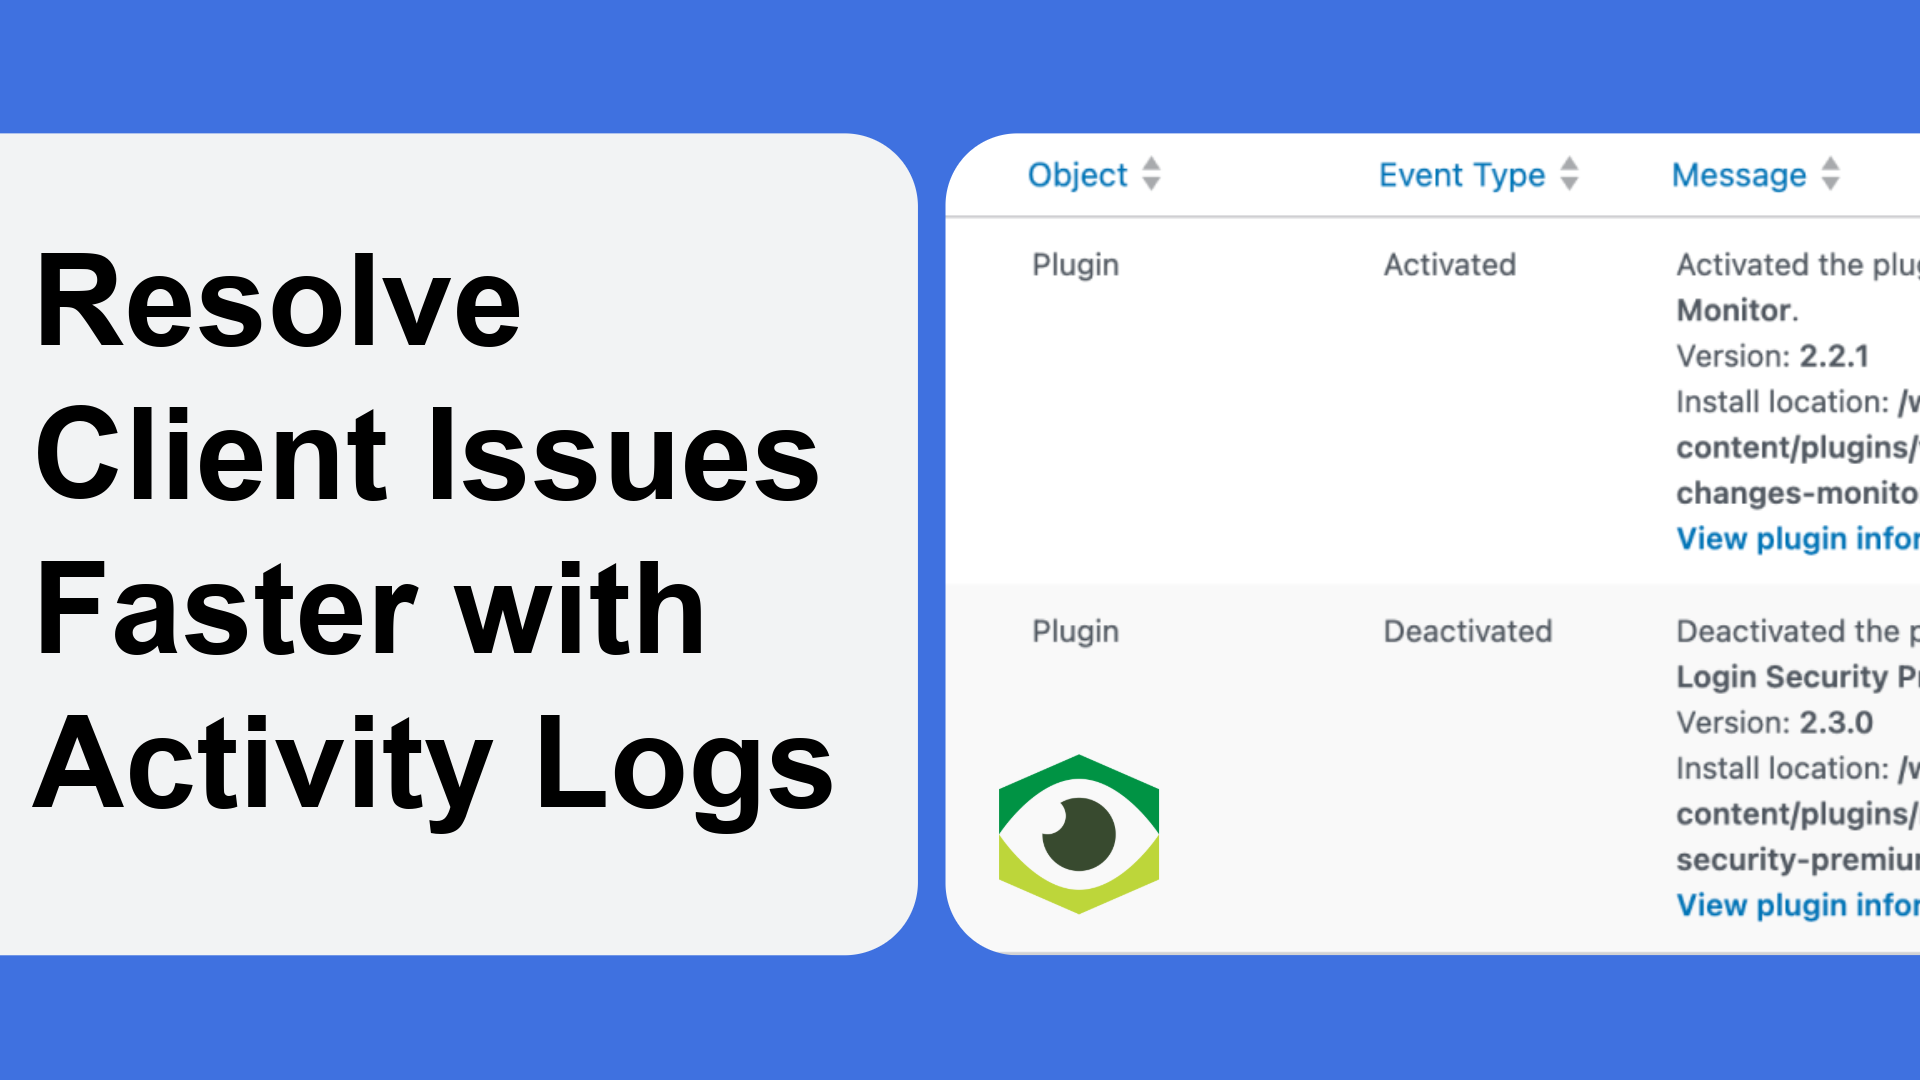
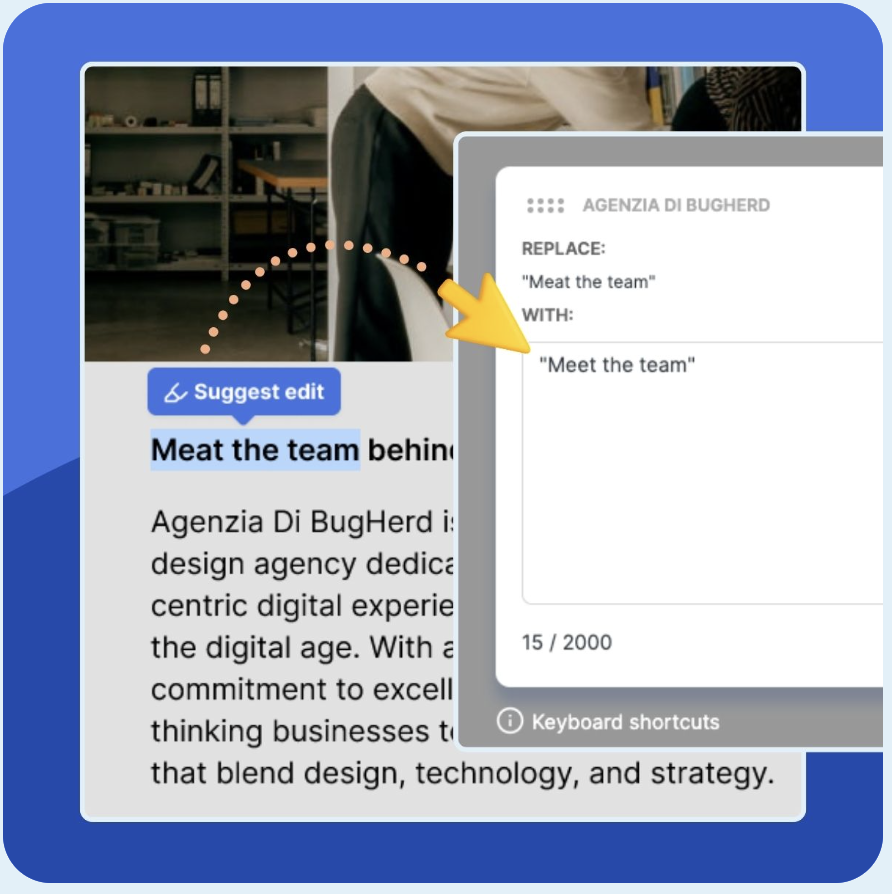
BugHerd
BugHerd is a powerful web feedback tool for performing web app testing on a live website in production. It’s not only user friendly, but also allows your development team, client, and target audience to test the site’s functionality and report bugs.
The app has a simple interface that makes it easy for anyone to use its powerful features. BugHerd's collaboration tools allow users to create website testing projects and invite unlimited guests.
Only people with guest access can use BugHerd to review the website. Uninvited participants cannot see the BugHerd tags or tasks.
BugHerd users don't have to provide technical specifications of their devices when creating a bug report. The app automatically includes device specs. There is also an in-built, kanban-style issue tracker to manage open tasks.
You can use BugHerd by installing the browser extension or by embedding the BugHerd Javascript on the website. BugHerd recommends embedding the Javascript for maximum usability. However, installing an extension may be more convenient for some users.
BugHerd's interoperability makes it an excellent visual feedback tool for web development agencies in particular. It supports integration with Asana and several other business apps. You can also use Integromat or Zapier to create custom integrations for unavailable apps.
ReadyAPI by SmartBear
Automate the tedious task of managing scripts while creating thorough, data-driven functional API tests with ReadyAPI. This API testing app speeds up security, load, and functional testing of RESTful, SOAP, GraphQL, and other web services inside your CI/CD pipeline.
ReadyAPI is excellent for performance testing. Users can generate stress, load, and spike tests to assess an API's capacity to handle real-world traffic conditions.
You can configure ReadyAPI to meet your testing objectives. This level of stress testing ensures your API won't break when exposed to test conditions in the real world.
ReadyAPI's automation and customization capabilities make it an excellent web application testing tool for experienced and inexperienced agencies.
Integrate BugHerd and ReadyAPI for an intelligent system that can test APIs and track reported issues.
Tricentis
Arguably the best codeless web application testing tool, Tricentis allows teams to automate software testing. The app works for mobile and web application testing.
Tricentis Tosca is known for its model-based test automation approach, which allows users to create and maintain automated tests using visual models instead of scripting. This approach simplifies the test process and reduces maintenance efforts, making it suitable for technical and non-technical users.
The Tricentis platform supports end-to-end testing, including functional, performance, load, mobile, and API tests. It provides features for test case design, test data management, test execution, and test reporting.
In addition to automated testing, Tricentis also offers tools for test management, test data provisioning, and service virtualization. These tools help organizations optimize their testing processes, increase test coverage, and improve the overall quality of their software applications.
Conclusion
You do not have to master web app testing before including the practice in your development process. Tools like BugHerd and API testing platforms like ReadyAPI can automate and accelerate your testing process.
The important lesson is to make testing a consistent practice of your overall web maintenance strategy. Perform web app tests often to prevent expensive and time-consuming bug fixes after you have already deployed your app for production.
Up Next: Capture Video Feedback From Websites

Merrin Hughes
Try BugHerd on your site
See feedback in context
Click anywhere to leave feedback directly on your website.


But don't just take our word for it.
BugHerd is loved by 10,000+ companies,
350,000+ users across 172 countries.
4.8/5
4.7/5
4.5/5
5/5
8.7/10
Sam Duncan 📱📏 🌱
@SamWPaquet
"@bugherd where have you been all my life??
We just migrated our bug tracking over from Asana and have at least halved our software testing time🪳👏📈. "
Ashley Groenveld
Project Manager
“I use BugHerd all day every day. It has sped up our implementation tenfold.”
Sasha Shevelev
Webcoda Co-founder
"Before Bugherd, clients would try to send screenshots with scribbles we couldn't decipher or dozens of emails with issues we were often unable to recreate."
Mark B
Developer
“A no-brainer purchase for any agency or development team.”
Kate L
Director of Operations
"Vital tool for our digital marketing agency.”
Paul Tegall
Delivery Manager
"Loving BugHerd! It's making collecting feedback from non-tech users so much easier."
Daniel Billingham
Senior Product Designer
“The ideal feedback and collaboration tool that supports the needs of clients, designers, project managers, and developers.”
Chris S
CEO & Creative Director
“Our clients LOVE it”
Emily VonSydow
Web Development Director
“BugHerd probably saves us
at least 3-4hrs per week.”